Thers're two ways to install the keystone jacks.
One is a very traditional way that you can use the punching down tool on one core by one core.
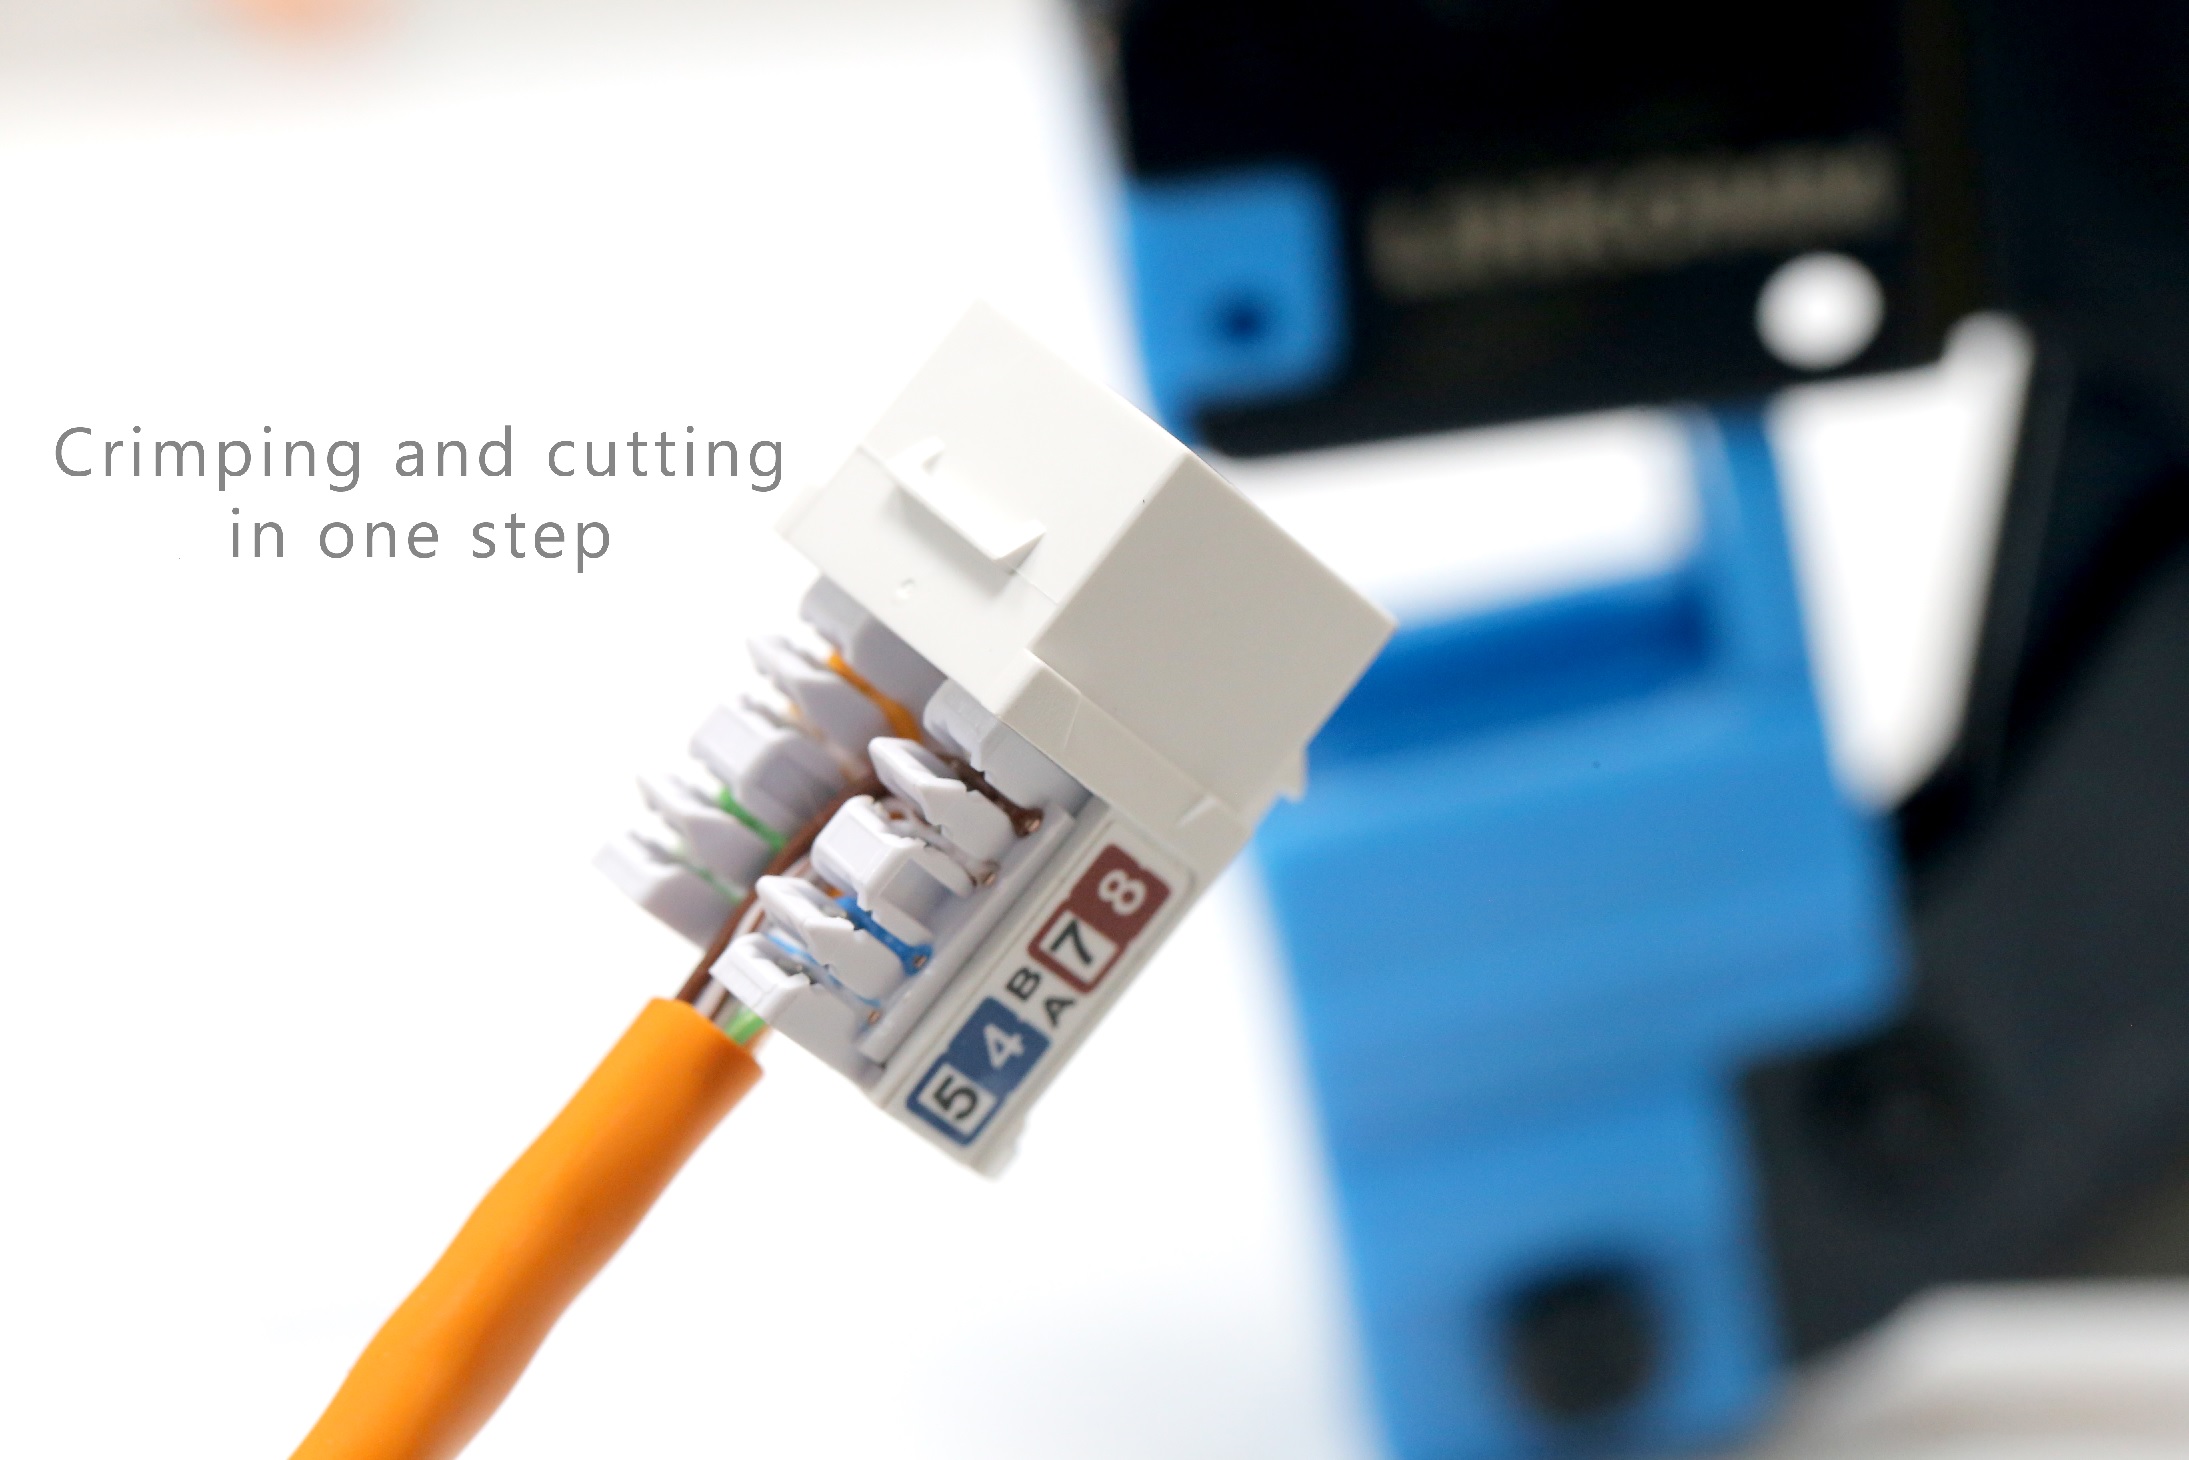
The other one is more quickly and more conveniently that you can crimp and cut the wire in one step with our keystone jack termination tool!
We're going to introduce two ways of installing the keystone jacks, then you can see the difference and our designed tips and tricks in the process.
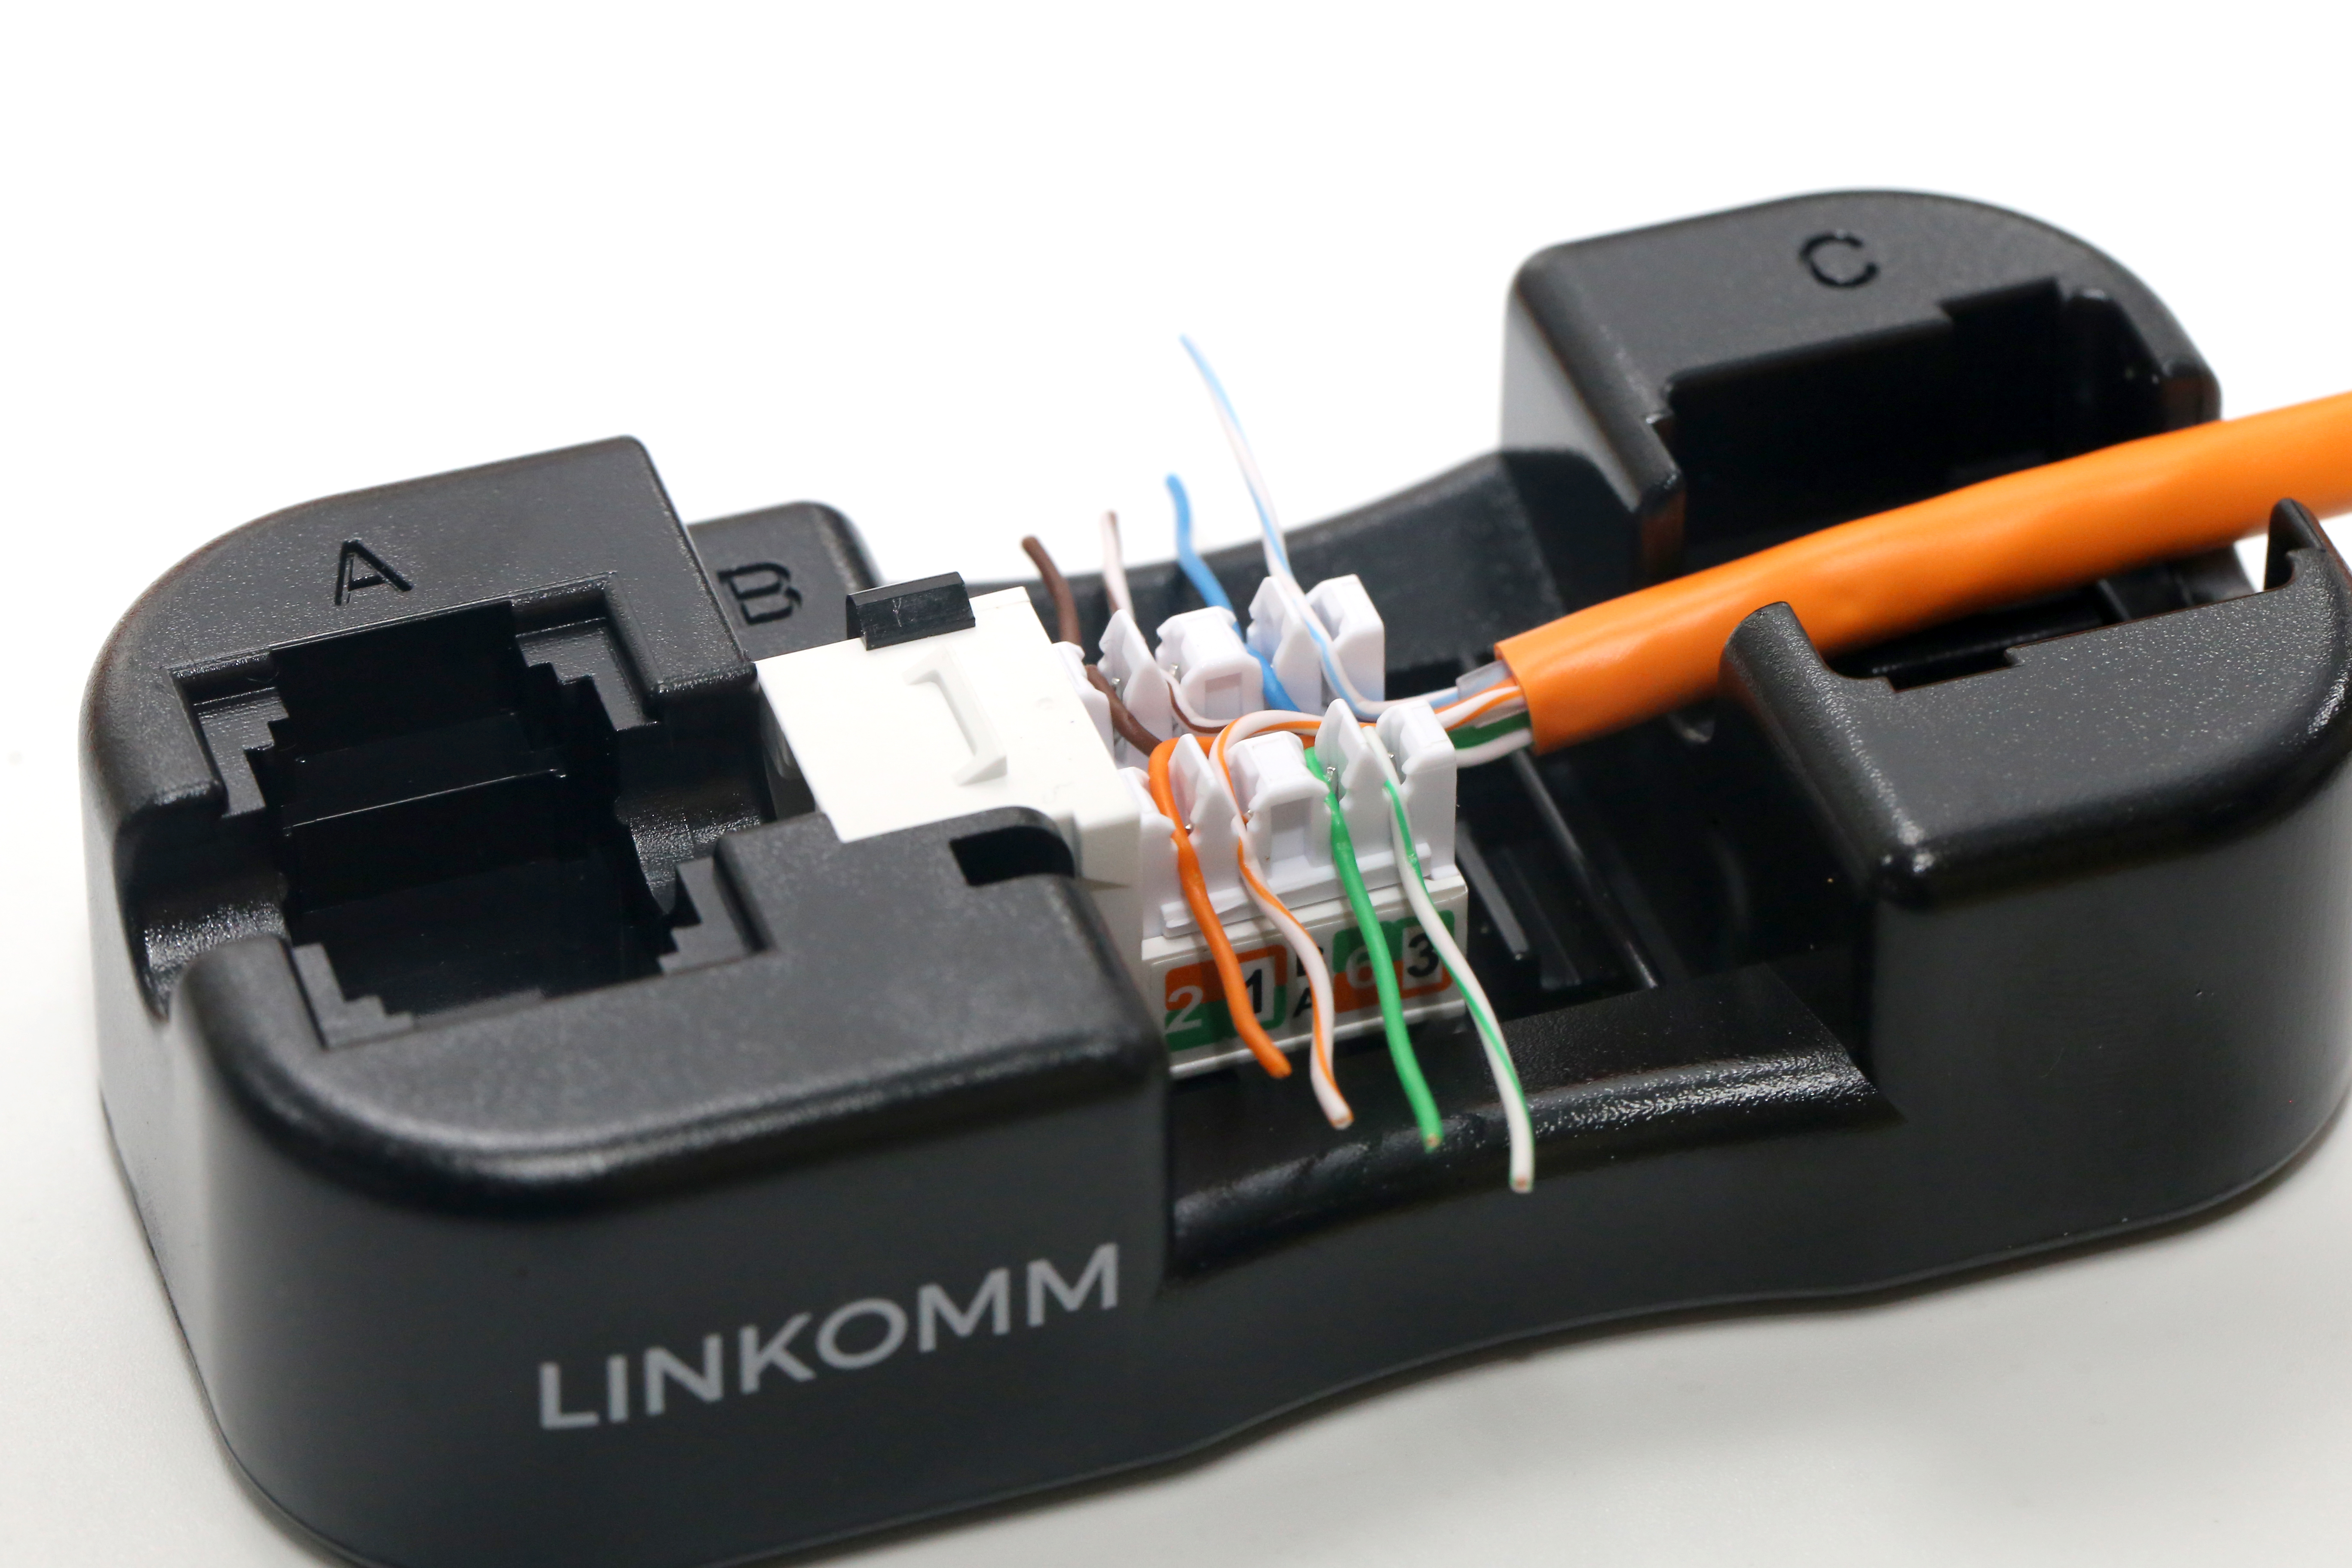
'' Traditional way '' ( Prepare Your Punching Down Tool, Punching Down Holder, and Stripping Tool before installing keystone jack.)
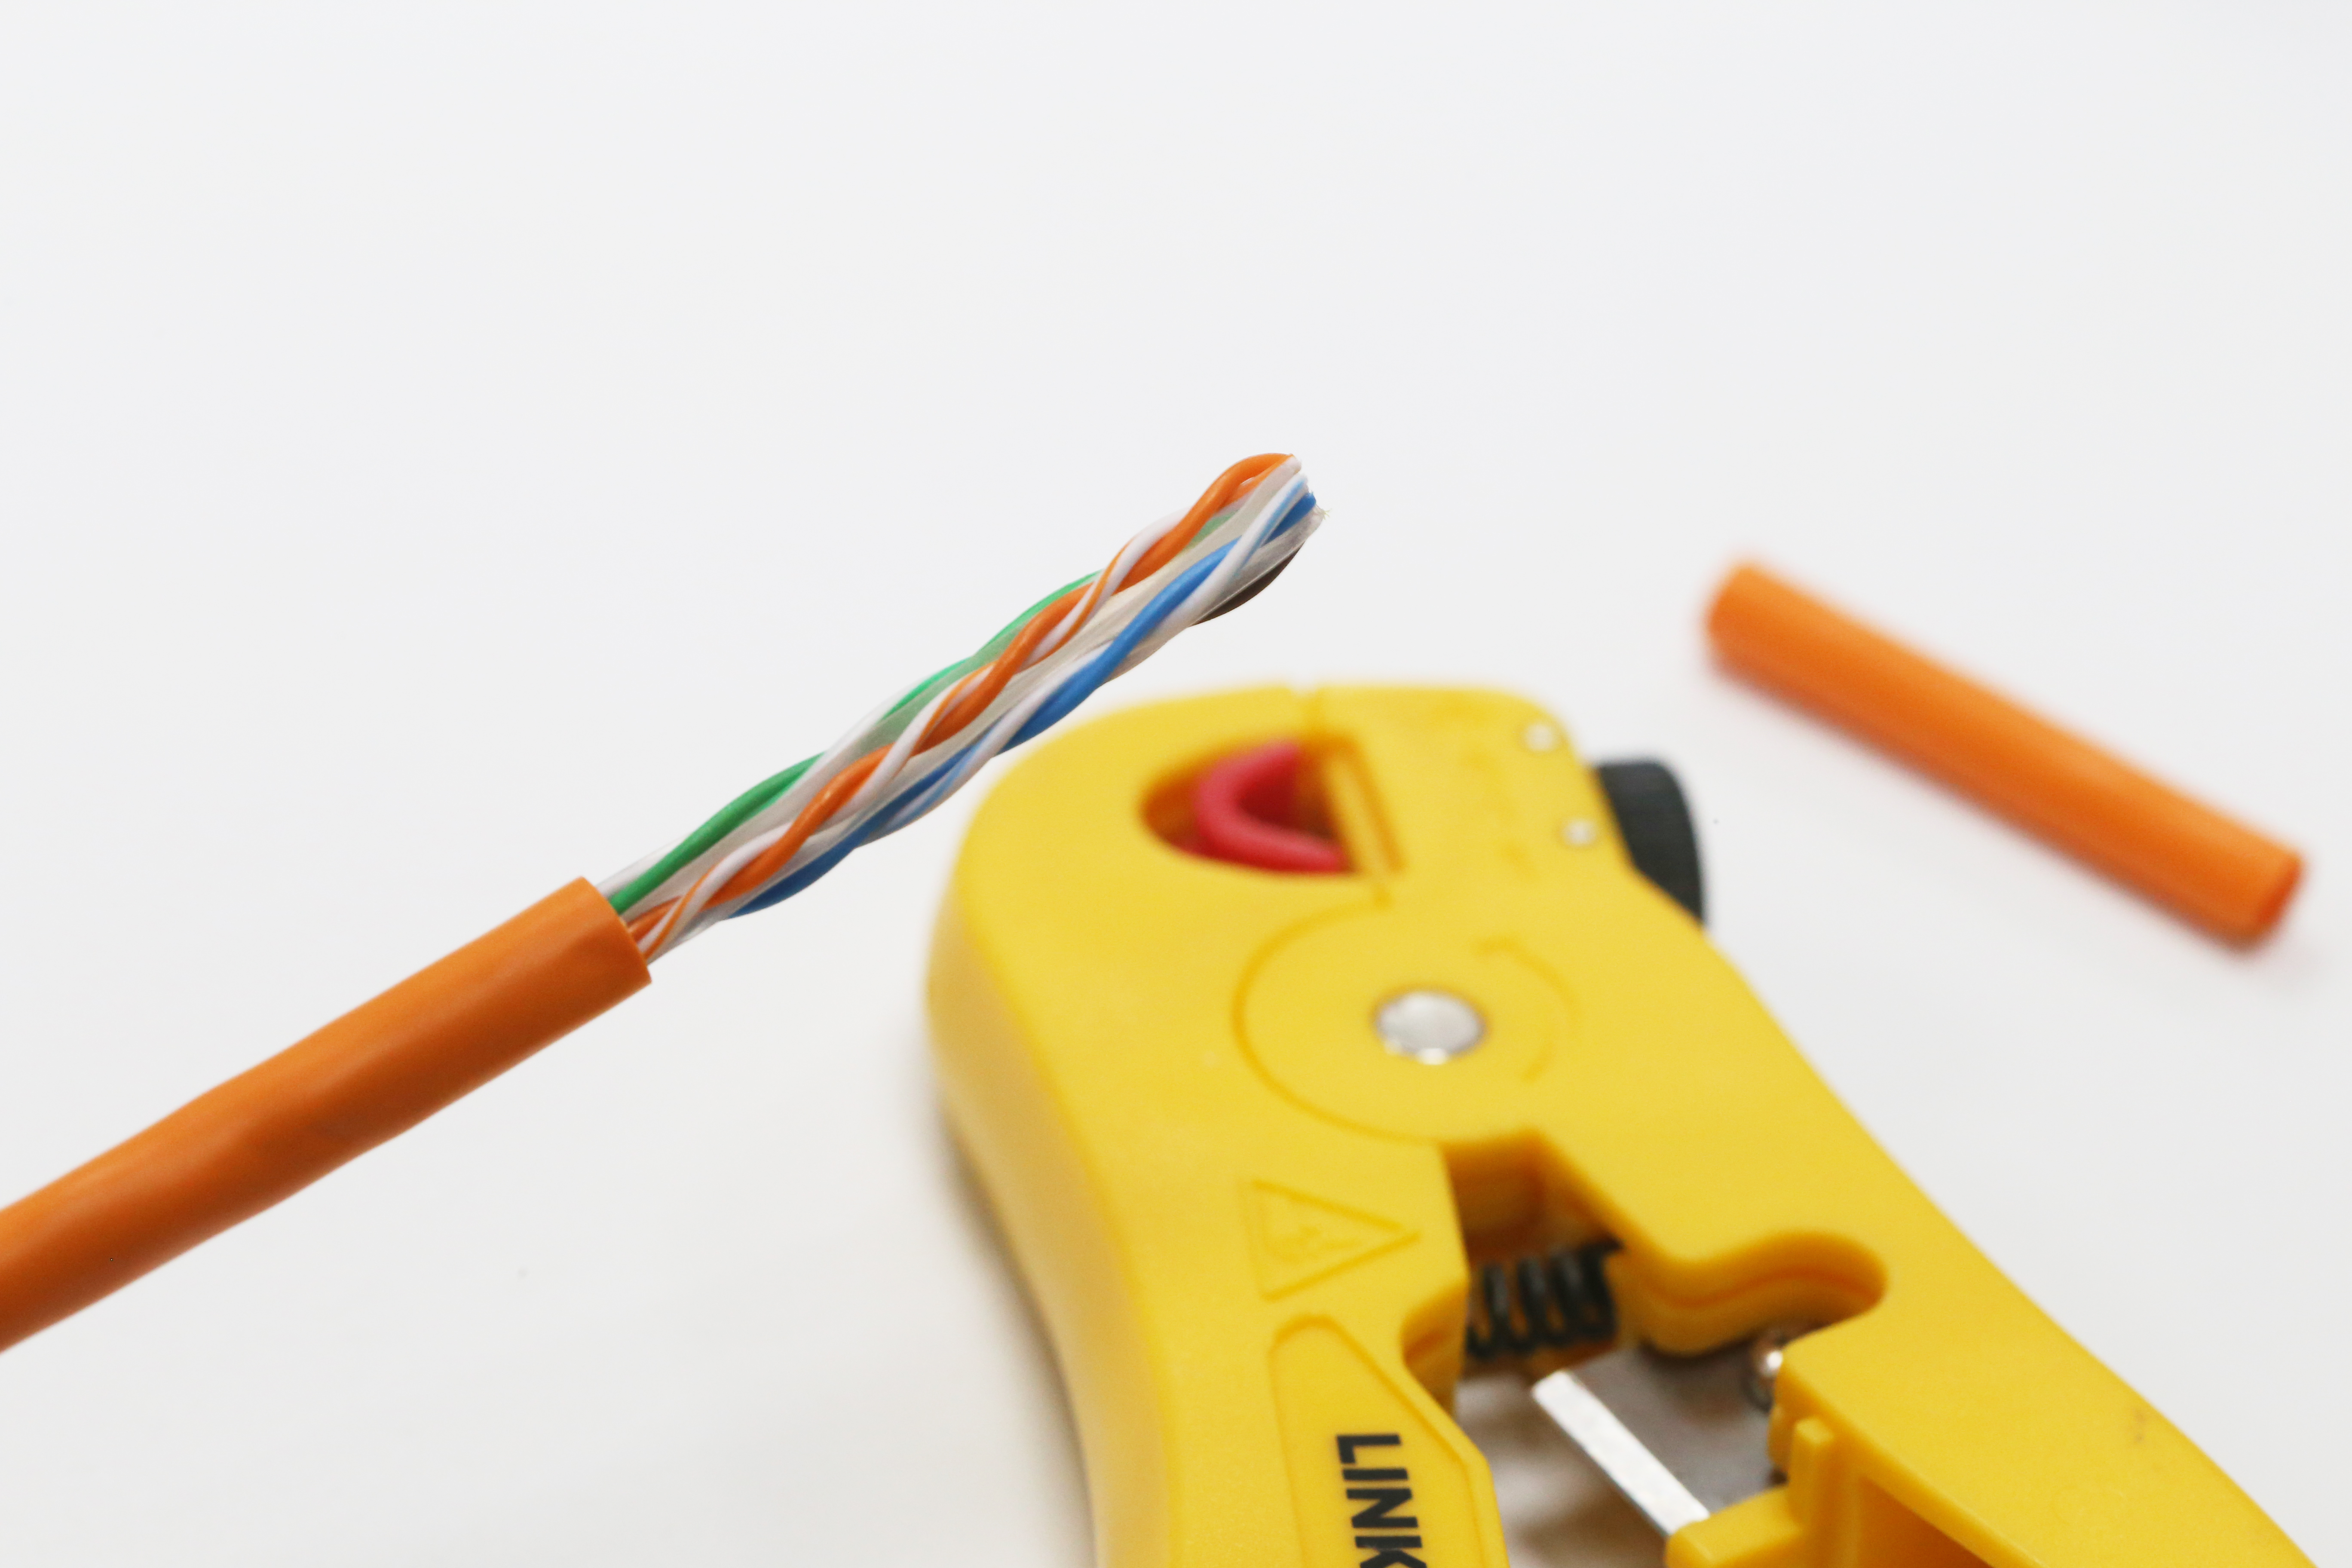
1. Strip the cable about 3~4 cm and separate the twisted wires
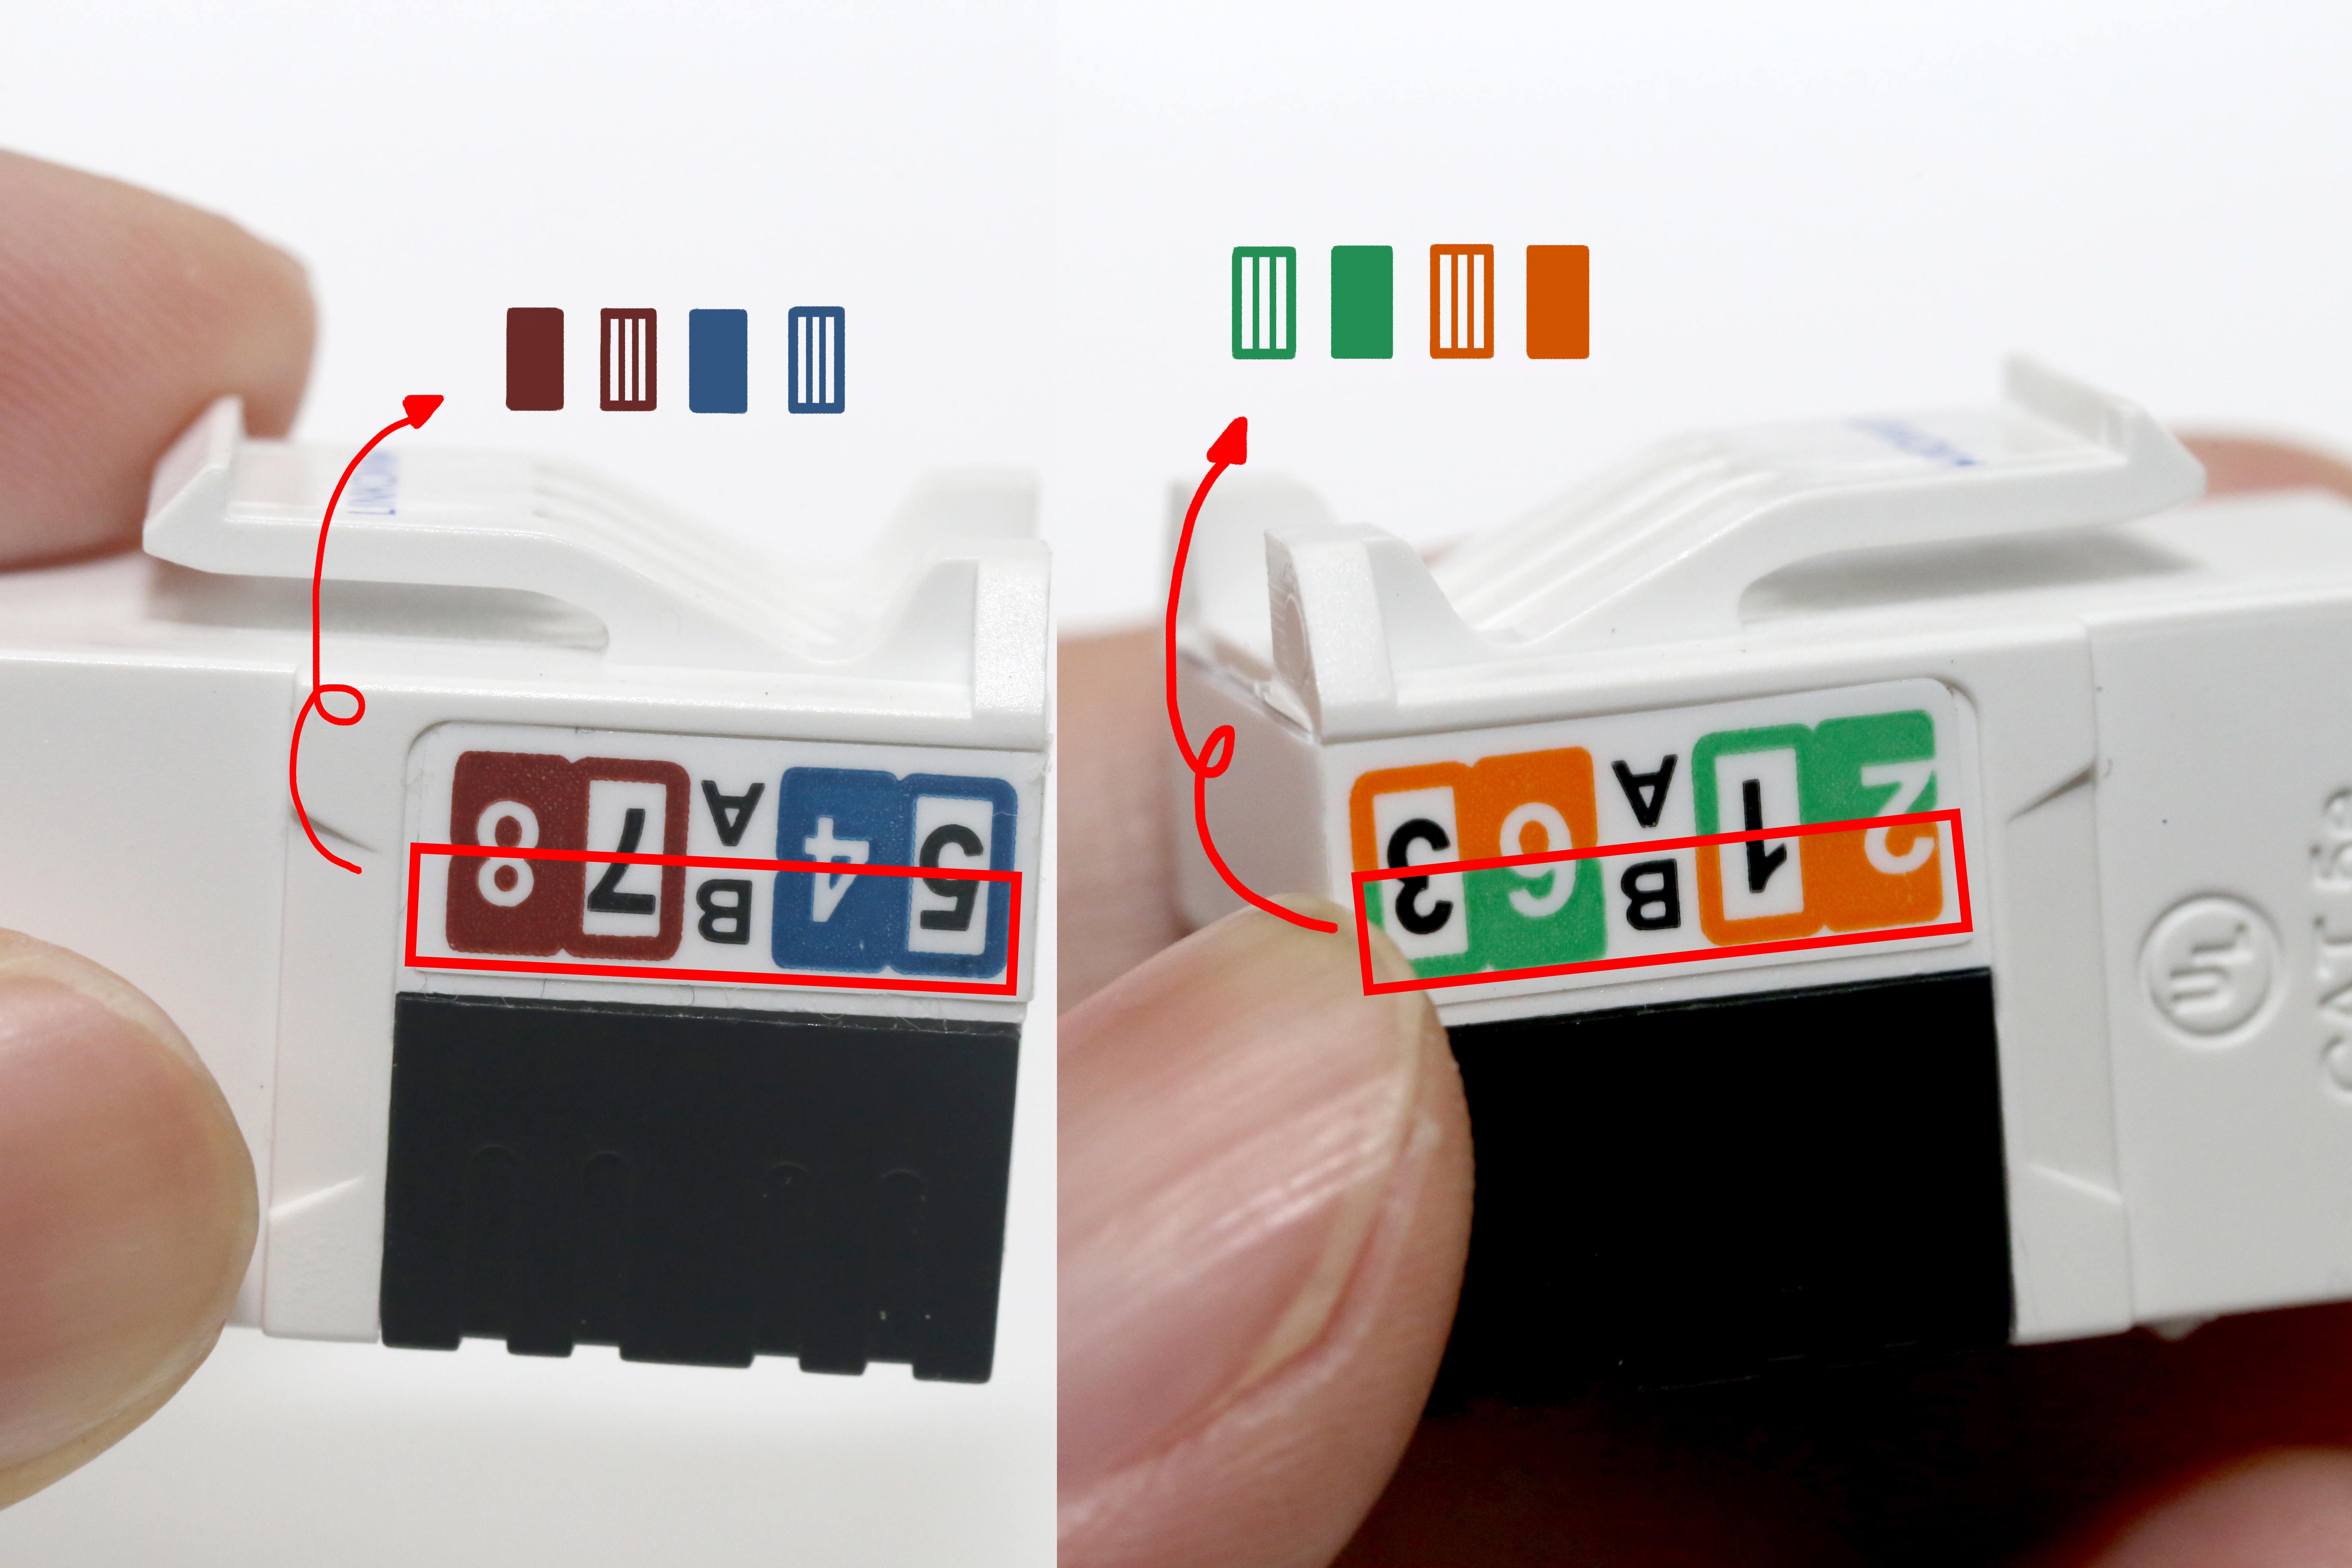
2. According to T568B wires arrangement, arrange the cores and place on the punching down holder.
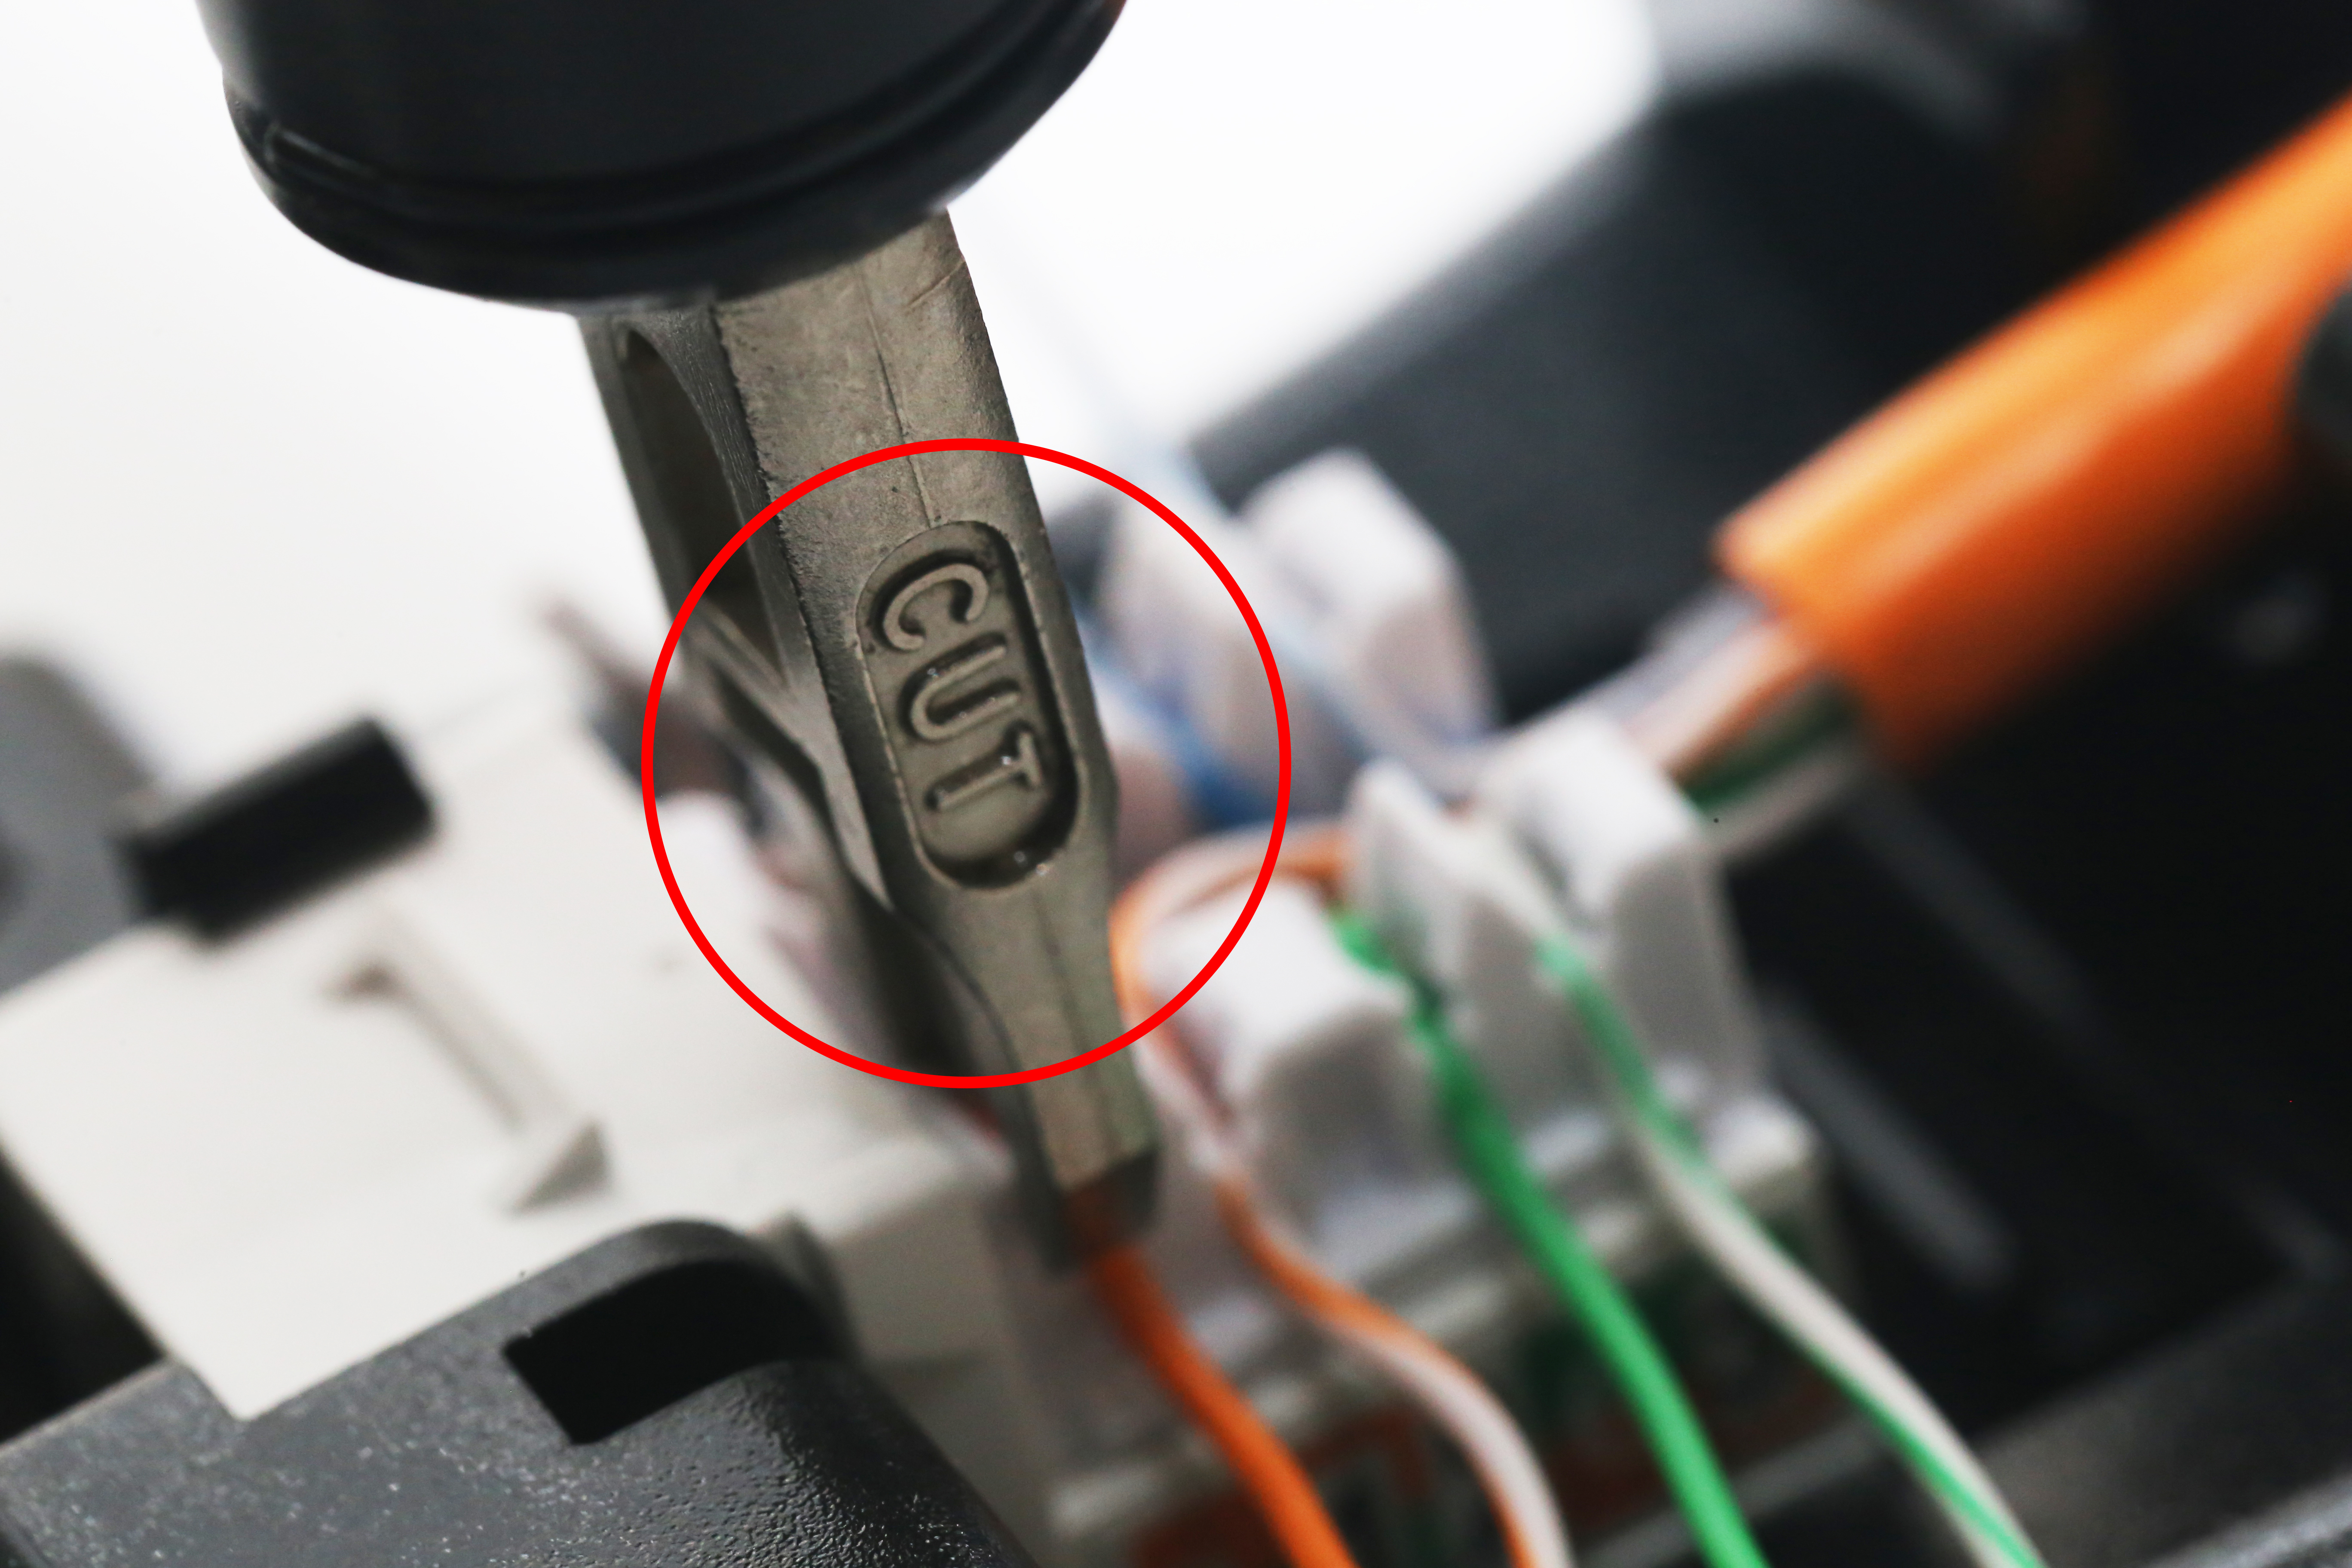
3.It's Punching down Tool turn! There are two blades on the different sides of the tool, you can crimp and cut the extra wires at the same time when the ''CUT'' blade on the outer side. Repeat this steps 8 times until all the wires which you arranged on the keystone jack are all crimped.
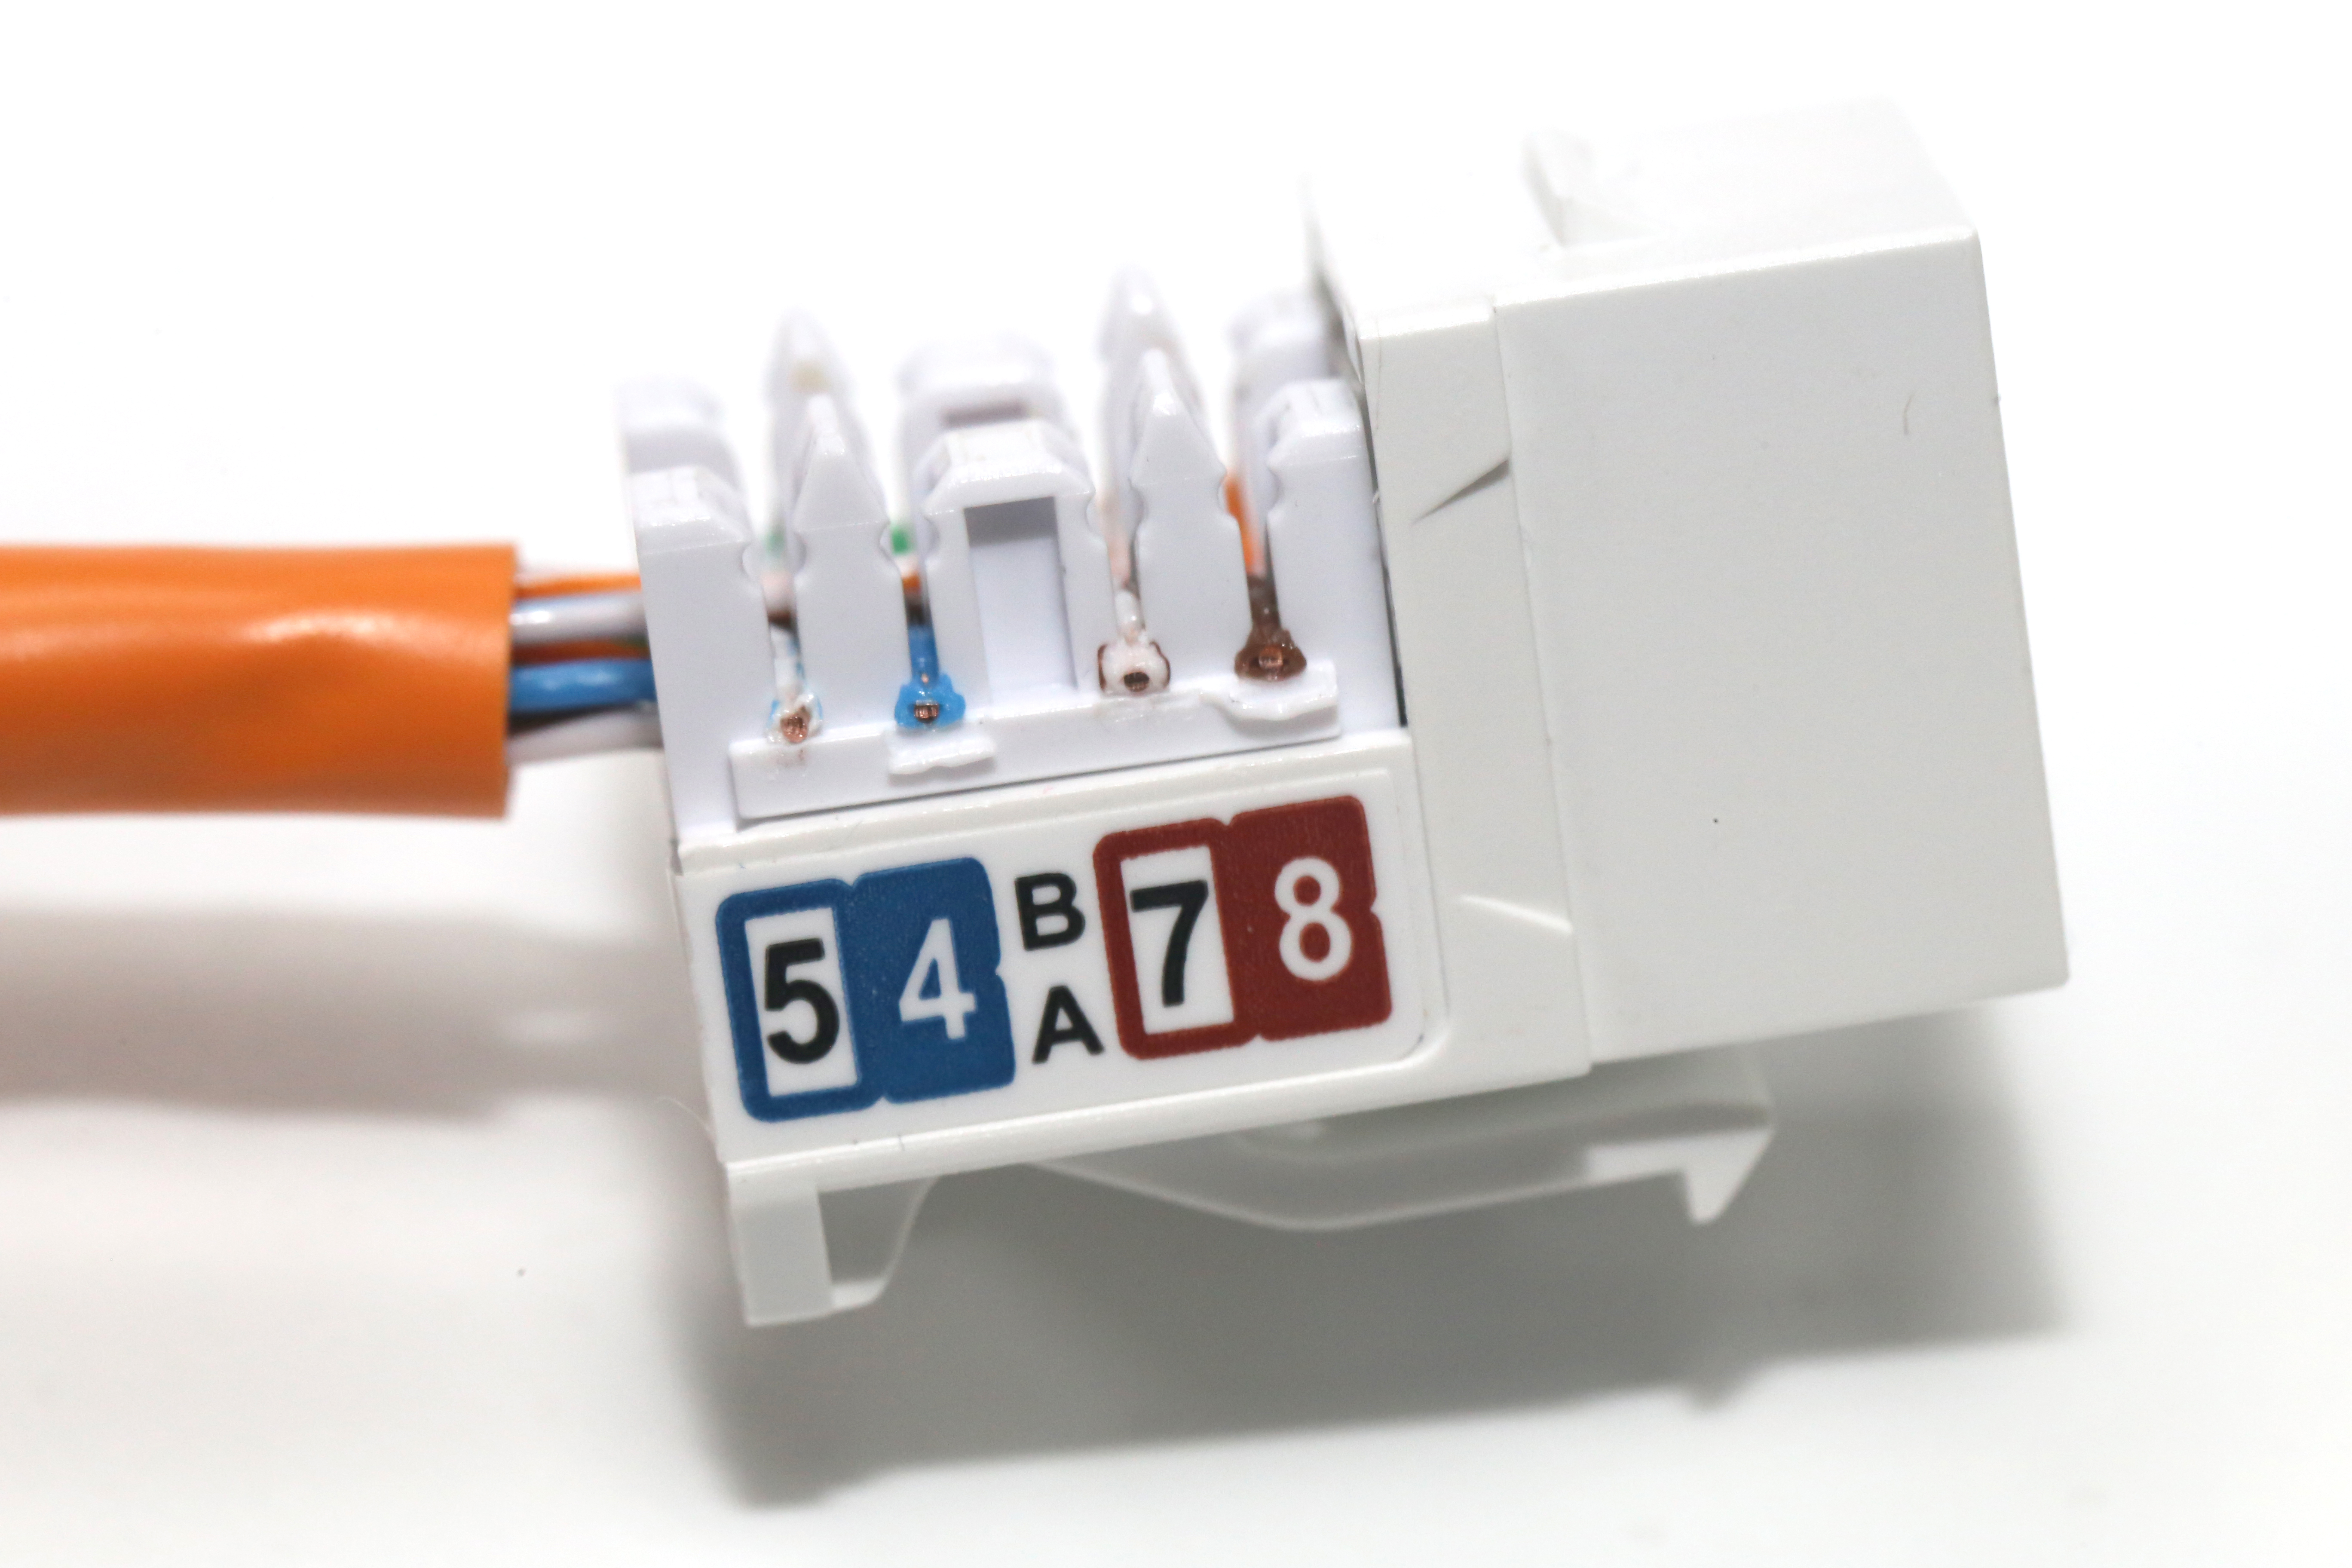
4. After crimping and cutting all the wires on the keystone jack, then we finish the installation!
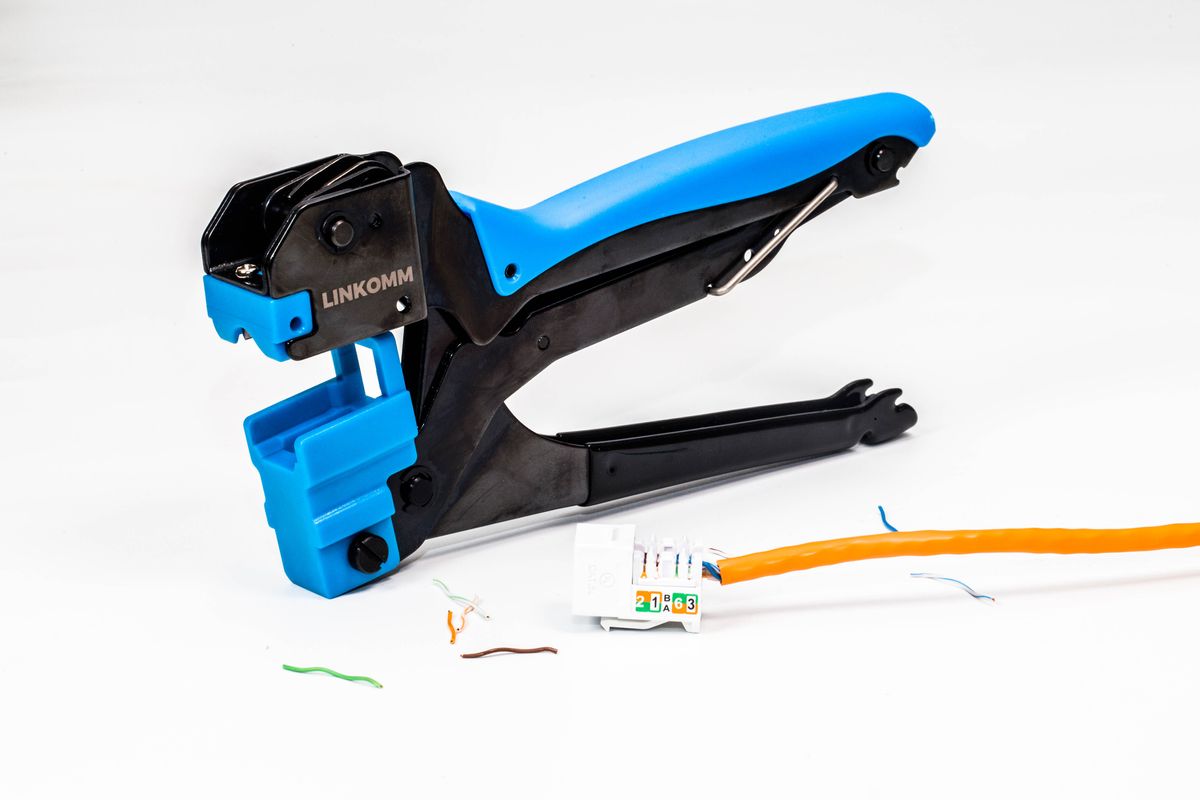
'' Quicker Way with One-Punch Keystone Jack Termination Tool '' ( Prepare Your One-Punch Keystone Jack Termination Tool and Stripping Tool before installing keystone jack.)
1. Strip the wires. ( As we teach above )
2. Arrange the wires according to T568B arrangement on the keystone jack, then put the jack in the seat for keystone jack of termination tool
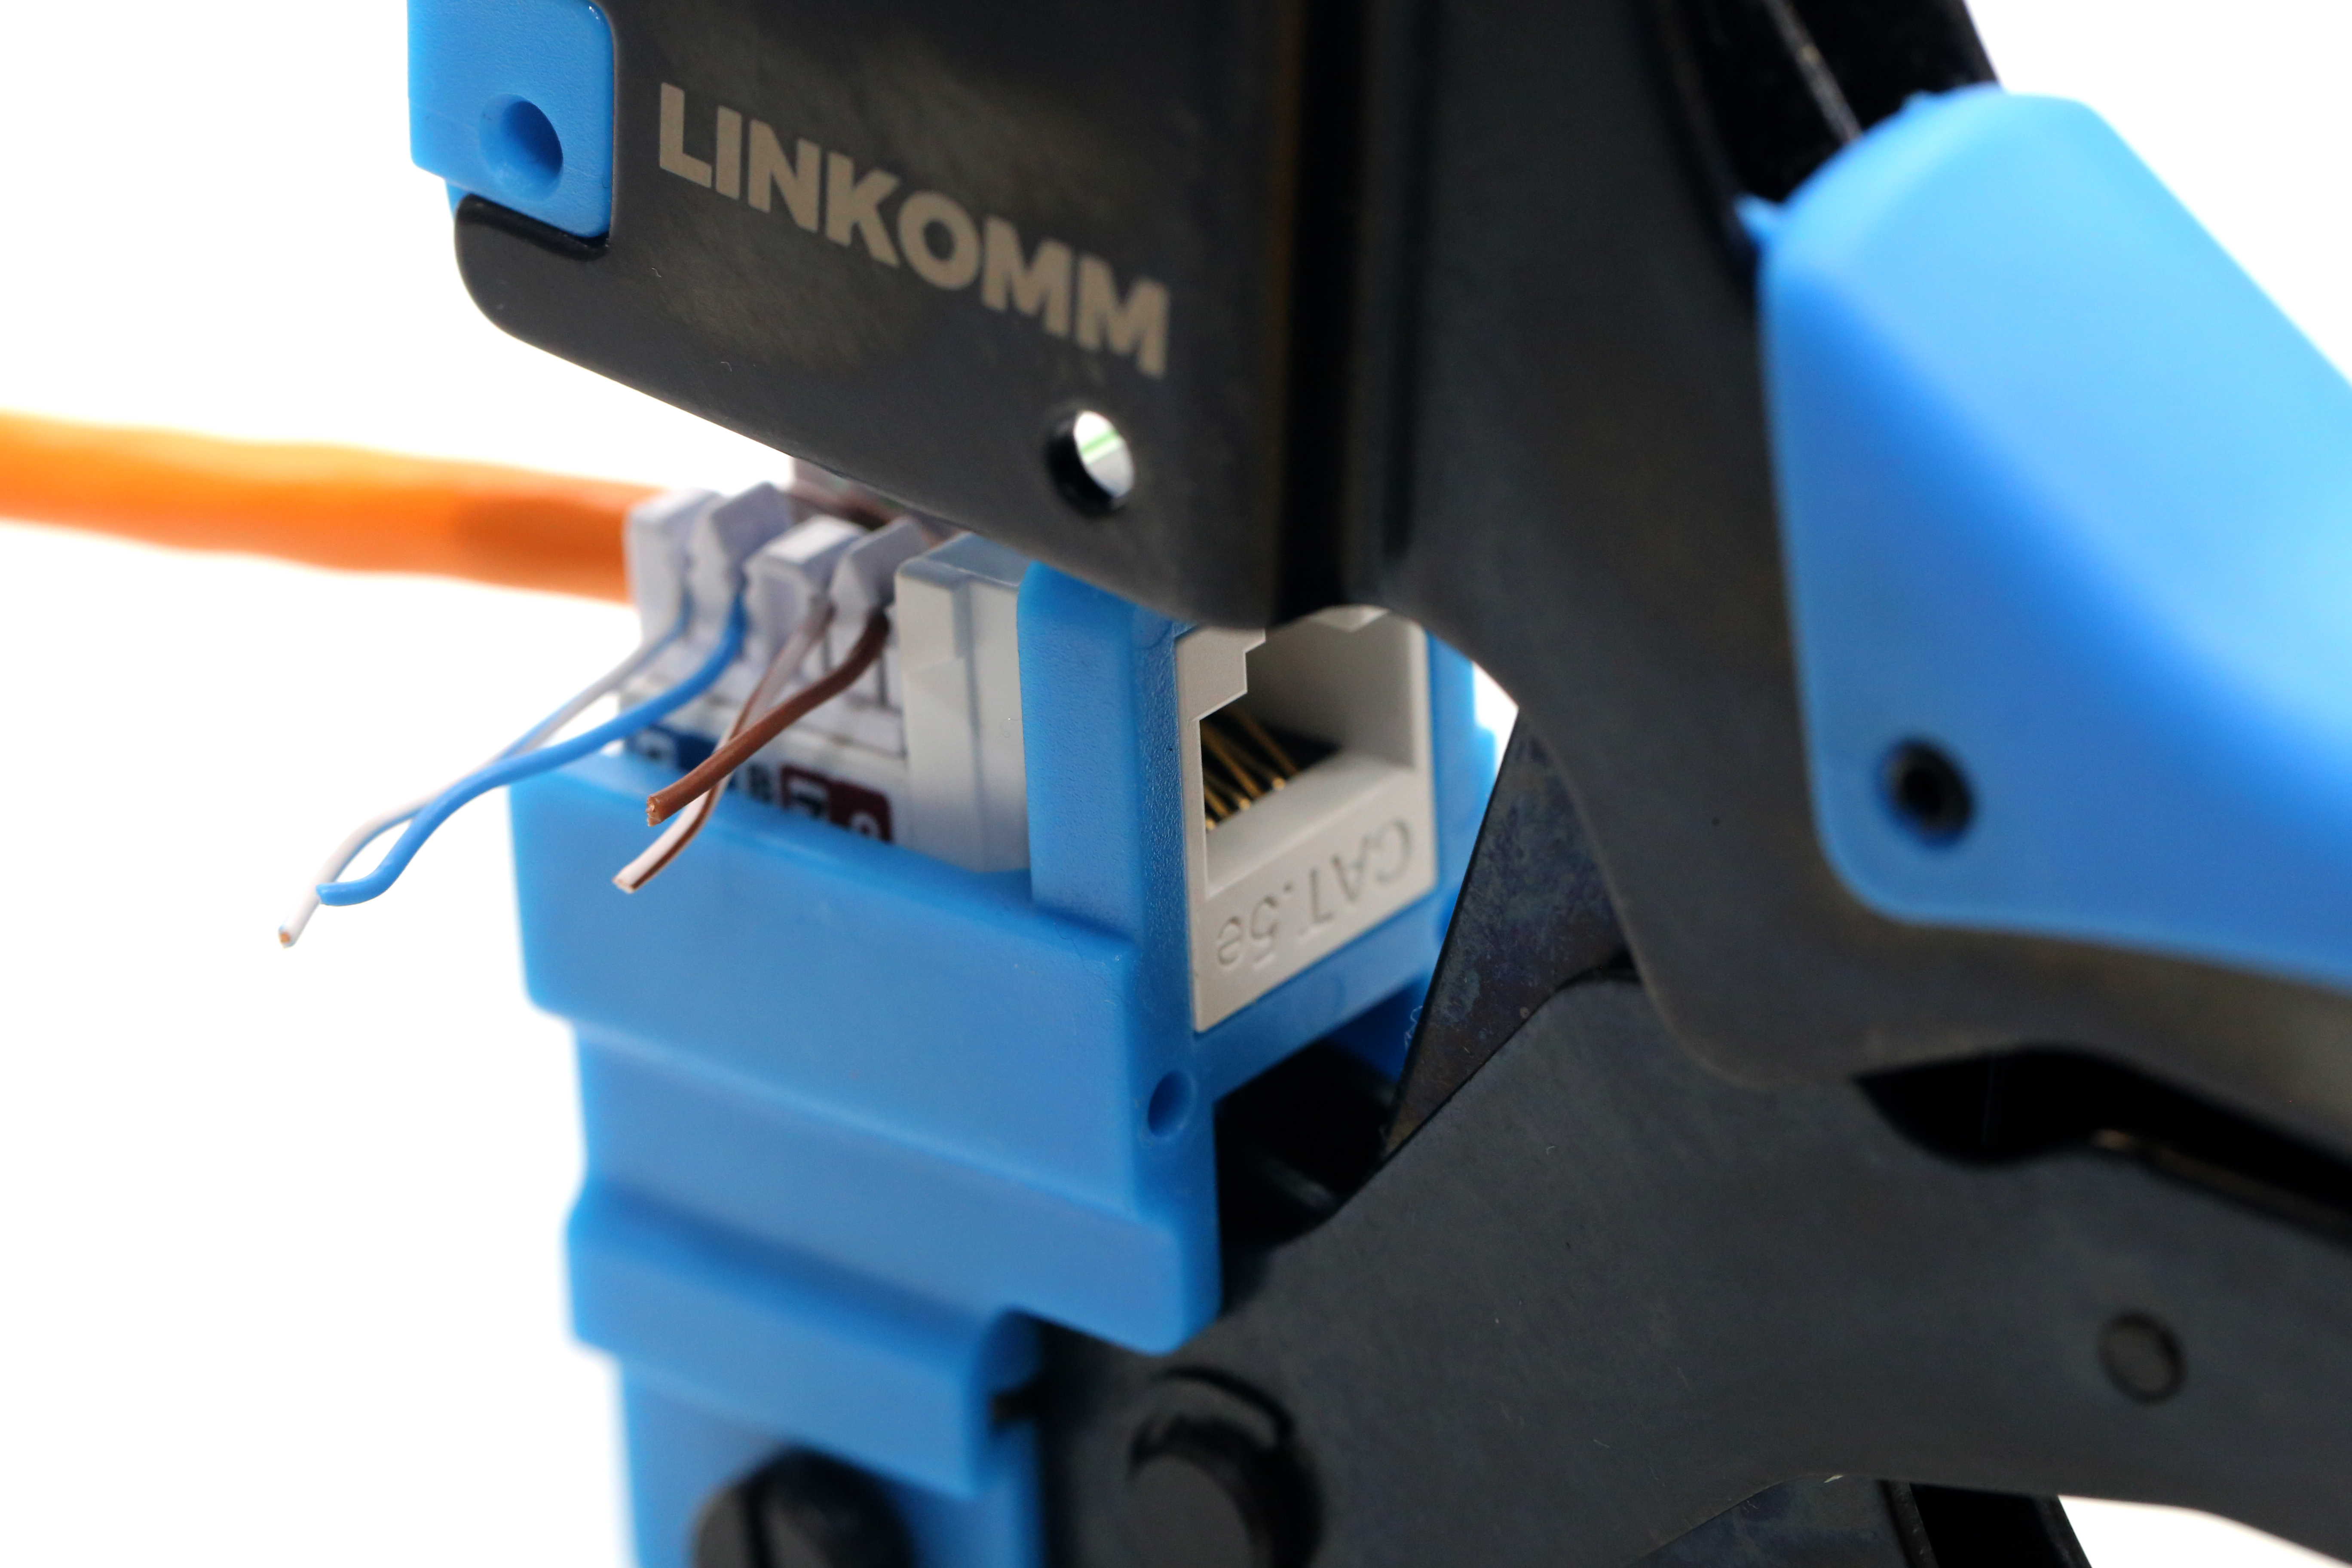
3. Punch down the wires with the tool, then you can crimp and cut the extra wires at the same time!